The Battle of Cowpens (January 17, 1781) was a decisive victory by American Revolutionary forces under Brigadier General Daniel Morgan, in the Southern campaign of the American Revolutionary War. It was a turning point in the reconquest of South Carolina from the British. Background[]On October 14, 1780, George Washington chose Nathanael Greene to be commander of the Southern Department of the Continental forces.[6] Greene's task was not an easy one. The Carolinas had seen a long string of disasters in 1780, the worst being the capture of one American army at the Siege of Charleston and the destruction of another at the Battle of Camden. A victory of Patriot militia over their Loyalist counterparts at the Battle of Kings Mountain in October had bought time, but most of South Carolina was still under British occupation. When Greene took command the southern army numbered only 2,300 men, of whom just 949 were Continental regulars.[7] On December 3 Daniel Morgan reported for duty to Greene's headquarters at Charlotte, North Carolina.[8] At the start of the Revolution, Morgan, whose military experience dated back to the French and Indian War, had served at the Siege of Boston.[9] Later he participated in the 1775 invasion of Canada and its climactic battle, the Battle of Quebec. That battle, on December 31, 1775, ended in defeat and Morgan's capture by the British.[10] Morgan was exchanged in January 1777 and placed by George Washington in command of a picked force of 500 trained riflemen. Morgan and his men played a key role in the victory at Saratoga that proved to be a turning point of the entire war.[11] Bitter after being passed over for promotion and plagued by severe attacks of sciatica, Morgan left the army in 1779, but a year later he was promoted to Brigadier General and returned to service in the Southern Department.[12] Greene decided that his weak army was unable to meet the British in a standup fight. He then made the unconventional decision to divide his army, sending a detachment west of the Catawba River to raise the morale of the locals and find supplies beyond the limited amounts available around Charlotte.[13] Greene gave Morgan command of this wing and instructed him to join with the militia west of the Catawba and take command of them.[14] Morgan headed west on December 21, charged with taking position between the Broad River and Pacolet River and protecting the civilians in that area. He had 600 men, some 400 of which were Continentals, the rest being Virginia militia with experience as Continentals.[15] By Christmas Day Morgan had reached the Pacolet River. There he was joined by 60 South Carolina militia led by the experienced partisan Andrew Pickens.[16] Other militia from Georgia and the Carolinas joined Morgan's camp.[17] Meanwhile, Lord Cornwallis was planning to return to North Carolina and conduct the invasion that he had postponed after the defeat at Kings Mountain.[18] Morgan's force represented a threat to his left. Additionally, Cornwallis received incorrect intelligence claiming that Morgan was going to attack the important British fort at Ninety Six, South Carolina. Seeking to save the fort and defeat Morgan's command, Cornwallis on January 2 ordered Lt. Col. Banastre Tarleton west. Tarleton was only 26 years old but had enjoyed a spectacular career that began when he and a small party surprised and captured Patriot Gen. Charles Lee in New Jersey in December 1776. He served with distinction at the Siege of Charleston and the Battle of Camden. Commanding the British Legion, a mixed infantry/cavalry force that constituted some of the best British troops in the Carolinas, Tarleton won decisive victories at Monck's Corner and Fishing Creek. He became infamous amongst Patriots after his victory at the Battle of Waxhaws, when his men killed American soldiers after they had surrendered. Tarleton and the Legion marched to Ninety Six and found that Morgan was not there, but Tarleton decided to pursue Morgan anyway. Tarleton asked for reinforcements of British regulars, which Cornwallis sent. Tarleton then set out with his enlarged command to drive Morgan across the Broad River.[19] On January 12 he received accurate news of Morgan's location and continued with hard marching, building boats to cross rivers that were flooding with winter rains.[20] Morgan, receiving word that Tarleton was in hot pursuit, retreated north, attempting to avoid being trapped between Tarleton and Cornwallis.[21] By the afternoon of the 16th Morgan was approaching the Broad River, which was high with flood waters and reported difficult to cross. He knew Tarleton was close behind. By nightfall he had reached a place called the Cowpens, a well-known grazing area for local cattle. Pickens, who had been patrolling, arrived that night with a large body of militia. Morgan then decided to stand and fight rather than continue to retreat and risk being caught by Tarleton while fording the Broad River. Tarleton, for his part, received word of Morgan's location and made haste, marching at 3 a.m. instead of camping for the night.[22] Prelude[]The Continental force[]The size of the American force at Cowpens remains in dispute. Although Morgan claimed in his official report to have had only a few over 800 men at Cowpens, historian Lawrence Babits, in his detailed study of the battle, estimates the real numbers as:
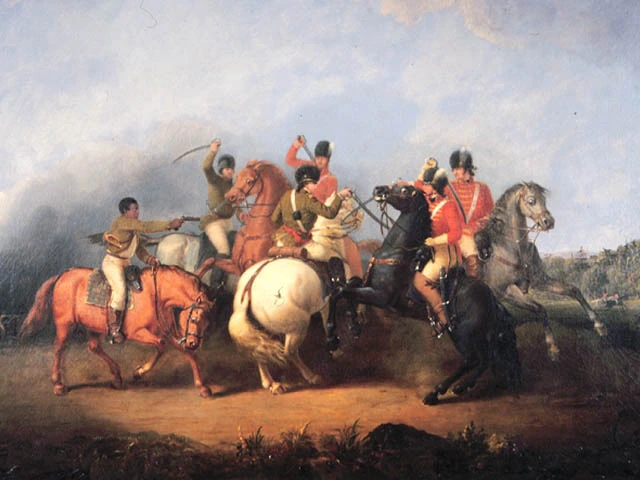
The figures given by Laurence E. Babits total 82 Continental light dragoons; 55 state dragoons; 45 militia dragoons; 300 Continental infantry; about 150 state infantry and 1,255-1,280 militia infantry, for a total of 1,887–1,912 officers and men. Broken down by state, there were about 855 South Carolinians; 442 Virginians; 290–315 North Carolinians; 180 Marylanders; 60 Georgians and 60 Delawareans. Historian John Buchanan disagrees, stating that the total was closer to Morgan's estimate, somewhere between 800 and 1000 men.[38] Whatever their total size, Morgan's Continentals were veterans, and many of his militia, which included some Overmountain Men, had seen service at the Battle of Musgrove Mill and the Battle of Kings Mountain. The British force[]"Lieutenant-Colonel Banastre Tarleton", whom William Tavington was based on. Tarleton's force included:
A total of over 1,150 officers and men.[41] Broken down by troop classification, there were 300 cavalry, 553 regulars, 24 artillerymen and 281 militia. Tarleton’s men from the Royal Artillery, 17th Light Dragoons, 16th Regiment and 71st Regiment were reliable and good soldiers: but the detachment of the 7th Regiment were raw recruits who had been intended to reinforce the garrison of Fort Ninety-Six where they could receive further training rather than go straight into action.[42] Tarleton's own unit, the British Legion were formidable "in a pursuit situation"[43] but had an uncertain reputation "when faced with determined opposition".[43] Morgan's plan[]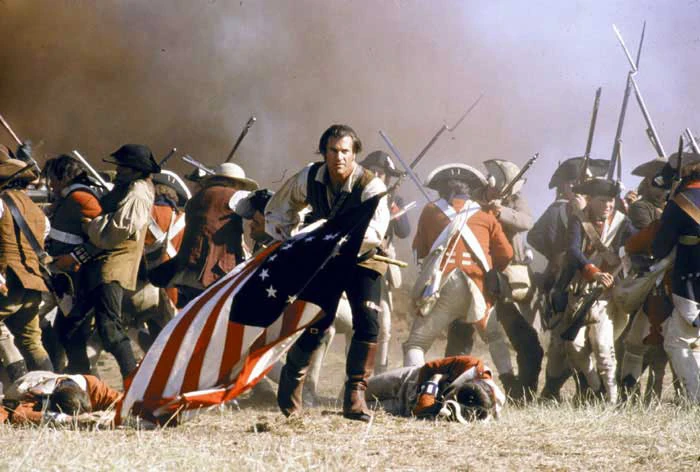  Benjamin Martin charging with the American flag in The Patriot. Daniel Morgan knew that he should use the unique landscape of Cowpens and the time available before Tarleton's arrival to his advantage. Furthermore, he knew his men and his opponent, knew how they would react in certain situations, and used this knowledge to his advantage.[44] He defied convention by placing his army between the Broad and Pacolet River, thus making escape impossible if the army was routed. His reason for doing so was to ensure that the untrained militiamen would not, as they had been accustomed to do, turn in flight at the first hint of battle and abandon the regulars.[45] (The Battle of Camden had ended in disaster when the militia, which was half of the American force, broke and ran as soon as the shooting started.) Selecting a low hill as the center of his position, he placed his Continental infantry on it,[46] deliberately leaving his flanks exposed to his opponent. Morgan reasoned that Tarleton would attack him head on, and he made his tactical preparations accordingly. He set up three lines of soldiers: one of skirmishers (sharpshooters); one of militia; and a main one. The 150 select skirmishers were from North Carolina (Major McDowell) and Georgia (Major Cunningham). The second line, behind the skirmishers but in front of the third line of Continentals, consisted of 300 militiamen under the command of Andrew Pickens. Battle of Cowpens Reenactment, 225th anniversary, January 14, 2006. Realizing that poorly trained militia were unreliable in battle, especially when they were under attack from cavalry, Morgan did not tell them to stand and fight. Instead, he asked the militia to fire two volleys and then withdraw around the left, so he could have them re-form in the rear, behind the third line, under cover of the reserve (light dragoons commanded by William Washington and James McCall). The movement of the militia in the second line would mask the third line to the British. The third line, on the hill, was manned by his best troops: about 550 men consisting of Continentals from Delaware and Maryland, and experienced militiamen from Georgia and Virginia. Colonel John Eager Howard commanded the Continentals and Colonels Tate and Triplett the militia. The goal of this strategy was to weaken and disorganize Tarleton's forces (which would be attacking the third line uphill) before attacking and defeating them. Howard’s men would not be unnerved by the militia’s expected move, and unlike the militia they would be able to stand and hold, especially since the first and second lines, Morgan felt, would have inflicted both physical and psychological damage on the advancing British before the third line came into action. With a ravine on their right flank and a creek on their left flank, Morgan's forces were protected against British flanking maneuvers at the beginning of the battle. Morgan insisted,[47]
In developing his tactics at Cowpens, as historian John Buchanan wrote, Morgan may have been "the only general in the American Revolution, on either side, to produce a significant original tactical thought.”[48] Tarleton's approach[]Battle of Cowpens Reenactment, 225th anniversary, January 14, 2006 At 2:00 a.m. on January 17, 1781, Tarleton roused his troops and continued his march to Cowpens. Lawrence Babits states that, "in the five days before Cowpens, the British were subjected to stress that could only be alleviated by rest and proper diet". He points out that “in the forty-eight hours before the battle, the British ran out of food and had less than four hours’ sleep”.[49] Over the whole period, Tarleton’s brigade did a great deal of rapid marching across difficult terrain. Babits concludes that they reached the battlefield exhausted and malnourished. Tarleton sensed victory and nothing would persuade him to delay. His Tory scouts had told him of the countryside Morgan was fighting on, and he was certain of success because Morgan's soldiers, mostly militiamen, seemed to be caught between mostly experienced British troops and a flooding river.[50] As soon as he reached the spot, he formed a battle line, which consisted of dragoons on his flanks, with his two grasshopper cannon in between the British Regulars and American Loyalists. Tarleton’s plan was simple and direct. Most of his infantry (including that of the Legion) would be assembled in linear formation and move directly upon Morgan. The right and left flanks of this line would be protected by dragoon units. In reserve were the 250-man battalion of Scottish Highlanders (71st Regiment of Foot), commanded by Major Arthur MacArthur, a professional soldier of long experience who had served in the Dutch Scotch Brigade. Finally, Tarleton kept the 200-man cavalry contingent of his Legion ready to be unleashed when the Americans broke and ran. Battle[]  The flag flown during the battle became known as the Cowpens flag Morgan's strategy worked perfectly. The British drove in successive lines, anticipating victory only to encounter another, stronger line after exerting themselves and suffering casualties. The depth of the American lines gradually soaked up the shock of the British advance. At approximately 6:45 a.m., which was a few minutes before sunrise, Tarleton's van emerged from the woods in front of the American position.[50] Tarleton ordered his dragoons to attack the first line of skirmishers, who opened fire and dropped fifteen dragoons. The dragoons promptly retreated, whereupon Tarleton immediately ordered an infantry charge, without pausing to study the American deployment or to allow the rest of his infantry and his cavalry reserve to make it out of the woods. Tarleton attacked the skirmish line without pausing, deploying his main body and his two grasshopper cannon. The American skirmishers kept firing as they withdrew to join the second line manned by Pickens' militia.[51] The British attacked again, this time reaching the militiamen, who (as ordered) poured two volleys into the enemy. The British—with 40% of their casualties being officers—were astonished and confused. They reformed and continued to advance. Tarleton ordered one of his officers, Ogilvie, to charge with some dragoons into the "defeated" Americans. His men moved forward in regular formation and were momentarily checked by the militia musket fire but continued to advance. Pickens' militia filed around the American left to the rear as planned after getting off their second volley.[52] Taking the withdrawal of the first two lines as a full blown retreat, the British advanced headlong into the third and final line of disciplined regulars which awaited them on the hill. The 71st Highlanders were ordered to flank the American right. John Eager Howard spotted the flanking movement and ordered the Virginia militiamen manning the American right to turn and face the Scots. However, in the noise of battle Howard's order was misunderstood and the militiamen began to withdraw. It was now 7:45 am and the British had been fighting for nearly an hour. They were tired and disorganized, but they saw the militia withdrawing and believed the Americans were on the run. They charged, breaking formation and advancing in a chaotic mass. Morgan ordered a volley. Howard's militia stopped their withdrawal and made an about-face. The Virginians fired into the British at a range of no more than thirty yards, with deadly effect, causing the confused British to lurch to a halt. John Eager Howard then shouted "Charge bayonets!"[53] The Continentals, as ordered, then mounted a bayonet charge. Tarleton's force, faced with a terrible surprise, began to collapse; some surrendering on the spot, while others turned and ran. Howard's men charged forward and seized the British cannons. Washington's cavalry came around from behind the American left to hit the British on their right flank and rear. Pickens' militia, having re-formed, charged out from behind the hill—completing a 360-degree circle around the American position—to hit the 71st Highlander Scots on the British left flank and rear. Howard ordered the Virginia militia, whose withdrawal had brought on the British charge, to turn about and attack the Scots from the other direction. The shock of the sudden charge, coupled with the reappearance of the American militiamen on the left flank where Tarleton's exhausted men expected to see their own cavalry, proved too much for the British. Nearly half of the British and Loyalist infantrymen fell to the ground whether they were wounded or not. Their ability to fight had gone. Historian Lawrence Babits diagnoses "combat shock" as the cause for this abrupt British collapse—the effects of exhaustion, hunger and demoralization suddenly catching up with them.[54] Caught in a clever double envelopment that has been compared with the Battle of Cannae,[55] many of the British surrendered. With Tarleton's right flank and center line collapsed, there remained only a minority of the 71st Highlanders who were still putting up a fight against part of Howard's line. Tarleton, realizing the desperate seriousness of what was occurring, rode back to his one remaining unit that was in one piece, the Legion Cavalry. He ordered them to charge, but they refused and fled the field.[56] The Highlanders, surrounded by militia and Continentals, surrendered. Desperate to save something, Tarleton managed to find about forty cavalrymen and with them tried to save the two cannons he had brought with him, but they had been taken. Tarleton with a few remaining horsemen rode back into the fight, but after clashing with Washington’s men, he too retreated from the field.[57] He was stopped by Colonel Washington, who attacked him with his saber, calling out, "Where is now the boasting Tarleton?". A Cornet of the 17th, Thomas Patterson, rode up to strike Washington but was shot by Washington's orderly trumpeter. Tarleton then shot Washington's horse from under him and fled, ending the battle.[58] It was 8 a.m. and the Battle of Cowpens had lasted approximately one hour.[57] Aftermath[]Reenactors playing Patriot troops march into battle at Cowpens Morgan's army took 712 prisoners, which included 200 wounded. Even worse for the British, the forces lost (especially the British Legion and the dragoons) constituted the cream of Cornwallis' army. Additionally, 110 British soldiers were killed in action. Tarleton suffered an 86 percent casualty rate, and his brigade had been all but wiped out as a fighting force.[57] John Eager Howard quoted Maj. McArthur of the 71st Highlanders, now a prisoner of the Americans, as saying that "he was an officer before Tarleton was born; that the best troops in the service were put under 'that boy' to be sacrificed."[59] An American prisoner later told that when Tarleton reached Cornwallis and reported the disaster, Cornwallis placed his sword tip on the ground and leaned on it until the blade snapped.[60] Historian Lawrence Babits has demonstrated that Morgan's official report of 73 casualties appears to have only included his Continental troops. From surviving records, he has been able to identify by name 128 Patriot soldiers who were either killed or wounded at Cowpens. He also presents an entry in the North Carolina State Records that shows 68 Continental and 80 Militia casualties. It would appear that both the number of Morgan's casualties and the total strength of his force were about double what he officially reported.[61] Tarleton's apparent recklessness in pushing his command so hard in pursuit of Morgan that they reached the battlefield in desperate need of rest and food may be explained by the fact that, up until Cowpens, every battle that he and his British Legion had fought in the South had been a relatively easy victory. He appears to have been so concerned with pursuing Morgan that he quite forgot that it was necessary for his men to be in a fit condition to fight a battle once they caught him. Nevertheless, Daniel Morgan, known affectionately as "The Old Waggoner" to his men, had fought a masterly battle. His tactical decisions and personal leadership had allowed a force consisting mainly of militia to fight according to their strengths to win one of the most complete victories of the war. Coming in the wake of the American debacle at Camden, Cowpens was a surprising victory and a turning point that changed the psychology of the entire war—"spiriting up the people", not only those of the backcountry Carolinas, but those in all the Southern states. As it was, the Americans were encouraged to fight further, and the Loyalists and British were demoralized. Furthermore, its strategic result—the destruction of an important part of the British army in the South—was incalculable toward ending the war. Along with the British defeat at the Battle of Kings Mountain, Cowpens was a decisive blow to Cornwallis, who might have defeated much of the remaining resistance in South Carolina had Tarleton won at Cowpens. Instead, the battle set in motion a series of events leading to the end of the war. Cornwallis abandoned his pacification efforts in South Carolina, stripped his army of its excess baggage, and pursued Greene's force into North Carolina. Skirmishes occurred at the Catawba River (February 1, 1781) and other fords. Yet, after a long chase Cornwallis met Greene at Guilford Court House, winning a pyrrhic victory that so damaged his army that he withdrew to Yorktown, Virginia, to rest and refit. Washington seized this opportunity to trap and defeat Cornwallis at the Battle of Yorktown, which caused the British to give up their efforts to defeat the Americans. In the opinion of John Marshall,[62] "Seldom has a battle, in which greater numbers were not engaged, been so important in its consequences as that of Cowpens." It gave General Nathanael Greene his chance to conduct a campaign of "dazzling shiftiness" that led Cornwallis by "an unbroken chain of consequences to the catastrophe at Yorktown which finally separated America from the British crown."[63] Memorials[]
The battle on film[]
Notes[]
References[]
External links[]
Warning: Default sort key "Battle Of Cowpens" overrides earlier default sort key "Cowpens". |
||||||||||||||||||||||||||||||
Advertisement
251
pages
Battle of Cowpens
Advertisement